Table Of Content

That’s why we recommend a simple base that can be quickly built and quickly abandoned should the worst happen such as the Mini Fort. It’s important to spend time setting up traps that are not easily seen or exploited in or around loot rooms. As with everyone else, your story begins on the beach. Seeing all those other nakeds running amok, you may feel a primal temptation to join the frenzy and smash your rock into the skull of that other feather. It will cost you precious time and health, and at best, leave you with a second rock. The Dream Solo / Duo / Trio Base Design video was created by My Gaming Experience.
The Norseman Duo Starter Base Design (
Inspired by “The Frustrator” base design, this is a smaller looking base that would pose a significant “aggravation” to any opponent seeking to raid it. It is secretly a floor stacked design, making it much harder for raiders to use the popular top-down raiding method. This base is smaller and will support up to a trio.
The Mini Igloo Solo Base Design (
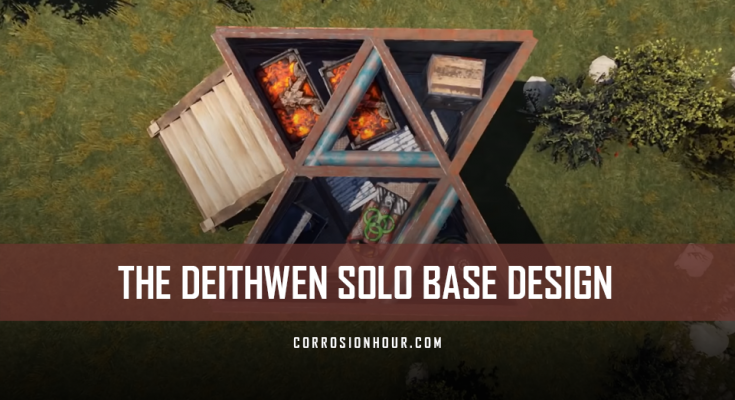
These honeycomb sections are very important indeed as they directly protect our main core inside the bunker. These are the six sections that should have been brought up. From the roof, we can now add the rest of each honeycomb. After that dropping down to the core you can see six large boxes, furnaces a tier 3 workbench, and sleeping bags.

Detachable External TC Build Cost (Per structure)
For stability reasons, we’ll add in this set of frames to each side. These will help hold up the overhands at the top. Now let’s upgrade, strengthen some key areas, and prepare to build the roof and defense floors. The first big thing is upgrading this door to a garage door. We’ll want to upgrade the important floor tiles to metal. Since the second floor has a lot of space, there are definitely more things you can add to it.
Base Resource Cost
Besides that, definitely upgrade the back two triangles, including the foundations of the core, to high-quality metal, and replace the window with an armored one. On the socket closest to you, place a half wall followed by a window frame. Next to it, build another, then a single door frame. Three ankle-bitter roof-peeks give you numerous angles to fight players that might be on top of your base. These ladder hatches provide quick access to the inner peek-down corridor.
If we take a look over here, I’ve added these ramps. These ramps give you a few more angles and help you peek at a specific angle easier while crouched. This is very helpful while controlling something like an M2. I’ll add these into the base, but you can skip them if you don’t like them. I put them next to the door and facing out, which I believe is the best way to put them.
High Capacity Storage Duo Base Design (
Rust: 10 Tips For Taking Down The Helicopter - TheGamer
Rust: 10 Tips For Taking Down The Helicopter.
Posted: Mon, 17 May 2021 07:00:00 GMT [source]
It also has auto turrets to cover 360 degrees all around it. The next floor just before the roof is the shooting floor. Which consists of a few turrets and some peeks as well as some storage boxes and respawn points that are next to said peeks looking at the rooftop so you won’t need to leave the shooting floor. The shooting floor of this base is the best of the best. You have wide gap peeks, free hand peeks, and even breach peeks, which are shooting spots you can use if someone took down your walls and is trying to get into the base from the side. The main loot room being located below the shooting floor makes it very hard to access, especially because of the breach peeks mentioned before.
The Padlock Duo RUST Base Design (
We’ll need six glass windows here and three garage doors for the frames. Like I said, this will be a heli garage, and not everyone can land in such a small space here. So what we’ll do is add some extra overhang to the edge around the base like this. To remove some of the angles players can use against you while you land, you can add in low walls around the balcony we just created.
Next, remove all your deployables in the core and finalize the TC compartment with a dropbox, window, and reinforced glass. Outside of the shell, you have to build this floating floor for the external peek-downs since you won’t be able to build it after this stage. Using a triangle roof eliminates a potential door camper hiding spot. Use a temporary roof ramp to gain access to your new entrance.
It’s up to you if you want to upgrade the foundations. Now not many people would aim rockets at the floor. However, if your terrain is really bad and these foundations are way higher than shown in the video here, then I would suggest upgrading them to metal as well. Another important upgrade is the two walls down here. Now the base is pretty much done as far as shape and size, but we do have a couple of final upgrades to do.
He believes that showing his audience the most efficient way of building and expanding his designs will give them a fighting chance of gathering the materials necessary to complete the build. We’ll start here and upgrade all the core pieces. This stuff around the end can be left stone since it only leads into honeycomb.
This way, if you respawn in one bag, the timer of the second bag won’t reset. If you picked up valuable items on the way, hide a box in a bush or a stash in one of those rocks. Wood is the most urgent need since you want to craft a building plan, a hammer, a tool cupboard, and a key lock. A perfect choice when all you have at your disposal to farm materials is your rock. This video guides you all the way from the beach to a complete and well-optimized 2×1 starter base.


No comments:
Post a Comment